

In Microsoft Excel, you can use a picture as a sheet background for display purposes only. A sheet background isn't printed, and Excel doesn't retain it in an individual worksheet or in an item that you save as a web page.
Because a sheet background isn't printed, it can't be used as a watermark. However, you can mimic a watermark that prints by inserting a graphic in a header or footer.
Add a sheet background
- Select the worksheet that you want to display with a sheet background. Ensure that you select only one worksheet.
- On the Page Layout tab, in the Page Setup group, select Background.
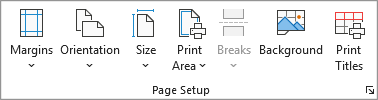
- Select the picture that you want to use for the sheet background, and then select Insert.
Excel repeats the selected picture to fill the sheet.
- To improve readability, hide the cell gridlines and apply solid color shading to cells that contain data.
- Excel saves a sheet background with the worksheet data when you save the workbook.
To use a solid color as a sheet background, apply cell shading to all cells in the worksheet.
Remove a sheet background
- Select the worksheet that displays a sheet background. Ensure that you select only one worksheet.
- On the Page Layout tab, in the Page Setup group, select Delete Background.
Delete Background is available only when a worksheet has a sheet background.
Mimic a watermark in Excel
Excel doesn't have a built-in watermark feature. However, you can mimic a watermark in two ways:
You can display watermark information on every printed page. For example, to indicate that the worksheet data is confidential or a draft copy, insert a picture that contains the watermark information in a header or footer. That picture then appears behind the worksheet data, starting at the top or bottom of every page. You can also resize or scale the picture to fill the whole page.
You can also use WordArt on top of the worksheet data to indicate that the data is confidential or a draft copy.
Use a picture in a header or footer to mimic a watermark
- In a drawing program, such as Paintbrush, create a picture that you want to use as a watermark.
- In Excel, select the worksheet that you want to display with the watermark. Ensure that only one worksheet is selected.
- On the Insert tab, in the Text group, select Header & Footer.
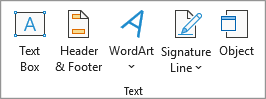
- Under Header, click either the left, center, or right header selection box.
- On the Header & Footer tab, in the Header & Footer Elements group, select Picture
 and then find the picture that you want to insert.
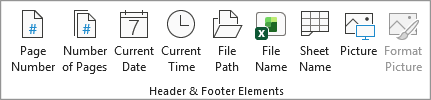
- Double-click the picture, and then &[Picture] appears in the header selection box.
- Click in the worksheet. The picture you selected appears in place of &[Picture].
- To resize or scale the picture, select the header selection box that contains the picture. In the Header & Footer Elements group, select Format Picture. Then, in the Format Picture dialog, select the options that you want on the Size tab.
- Changes to the picture or picture format take effect immediately and can't be undone.
- To add blank space above or below a picture, in the header selection box that contains the picture, click before or after &[Picture], and then press Enter to start a new line.
- To replace a picture in the header section box that contains the picture, select &[Picture], select Picture, and then select Replace.
- Before printing, make sure that the header or footer margin has sufficient space for the custom header or footer.
- To delete a picture in the header section box that contains the picture, select &[Picture], press Delete, and then click in the worksheet.
- To switch from Page Layout view to Normal view, select any cell, select the View tab, and then, in the Workbook Views group, select Normal.
Use WordArt to mimic a watermark
Click the worksheet location where you want to display the watermark.
On the Insert tab, in the Text group, click WordArt.
Select the WordArt style that you want to use.
For example, use Fill - White, Drop Shadow, Fill - Text 1, Inner Shadow, or Fill - White, Warm Matte Bevel.Type the text that you want to use for the watermark.
To change the size of the WordArt, do the following:
- Click the WordArt.
- On the Shape Format tab, in the Size group, enter the size that you want in the Shape Height and Shape Width boxes. This step only changes the size of the box that contains the WordArt.
You can also drag the sizing handles on the WordArt to the size that you want. - Select the text inside the WordArt. On the Home tab, in the Font group, select the size you want in the Font Size box.
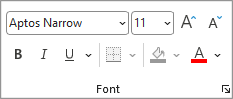
To add transparency so that you can see more of the worksheet data underneath the WordArt, do the following:
- Right-click the WordArt, and click Format Shape.
- In the Fill category, under Fill, select Solid fill.
- Drag the Transparency slider to the percentage of transparency that you want, or enter the percentage in the Transparency box.
If you want to rotate the WordArt, do the following:
- Select the WordArt.
- On the Shape Format tab, in the Arrange group, select Rotate.

- Select More Rotation Options.
- On the Size tab, in the Rotation box, enter the degree of rotation that you want.
- Select Close.
You can also drag the rotation handle in the direction that you want to rotate the WordArt.
Note
You can't use WordArt in a header or footer to display it in the background. However, if you create the WordArt in an empty worksheet that doesn't display gridlines (on the View tab, in the Show group, clear the Gridlines checkbox), you can press the Print screen key to capture the WordArt, and then paste the captured WordArt into a drawing program. You can then insert the picture that you created in the drawing program into a header and footer as described in Use a picture in a header or footer to mimic a watermark.
Need more help?
You can always ask an expert in the Excel Tech Community or get support in Communities.