Import passwords into the Microsoft Authenticator app
Microsoft Authenticator supports importing passwords from any browser that can export saved passwords.
Note: Starting July 2025, the autofill feature in Authenticator will stop working, and from August 2025, passwords will no longer be accessible in Authenticator. Learn more.
Step 1 - Export your passwords from your current password manager
Select your existing password manager from the headings below for the steps to export your passwords. If we don't currently support your existing password manager, select the steps to export using a comma-separated values (CSV) file.
Click the headings below for more information
-
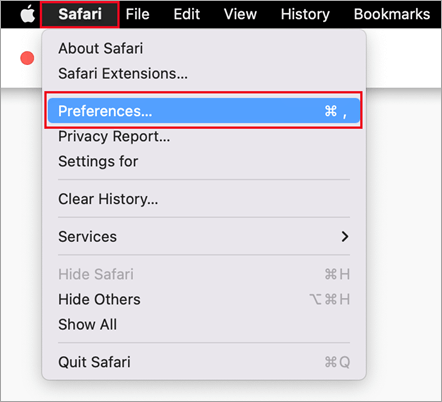
Open the Safari browser, click Safari, and open Preferences.
-
Select the Passwords tab and confirm your identity by entering your PIN, device password, fingerprints, or facial recognition.
-
Click the three dots icon and click Export Passwords.
-
Save the CSV file to your computer.
When it's done, continue to step 2, importing your passwords.
Google Chrome users on Android can import their passwords directly from their phone with a few simple steps.
-
Sign into the Google Chrome browser on your phone.
-
Tap the in the toolbar, then tap Settings.
-
In Settings, select Password Manager.
-
Tap Settings then tap Export passwords.
-
Tap Export to start exporting.
-
Choose where you want to save the CSV file and tap Save.
When it's done, continue to step 2, importing your passwords.
Google Chrome users on Apple phones can import their passwords directly from their phone with a few simple steps.
-
Sign in to the Google Chrome browser on your phone.
-
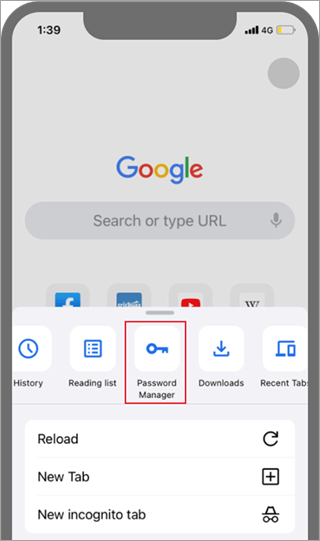
Tap the in the toolbar, then tap Settings.
-
Tap Password Manager.
-
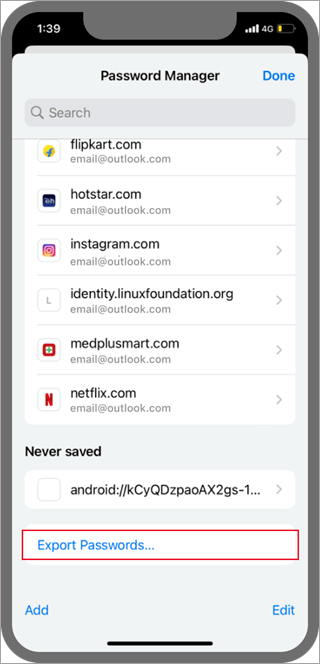
Scroll to the bottom, then tap Export passwords.
-
Confirm your identity using your PIN, fingerprint, or facial recognition to start exporting.
When it's done, continue to step 2, importing your passwords.
-
Open Microsoft Edge and go to Settings.
-
On the Profiles tab, under Microsoft Wallet, select Passwords.
-
Click on the three dots and choose Export passwords.
-
Choose a location and a name for the password file, which will be a CSV file.
When it's done, continue to step 2, importing your passwords.
Important: 1Password only allows exporting passwords from its desktop (Windows/Mac/Linux) app.
-
Open the 1Password app on your computer and sign into your account.
-
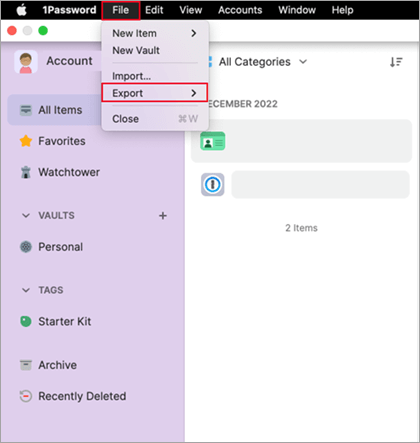
Select File, choose Export, and select the account you want to export your data from.
-
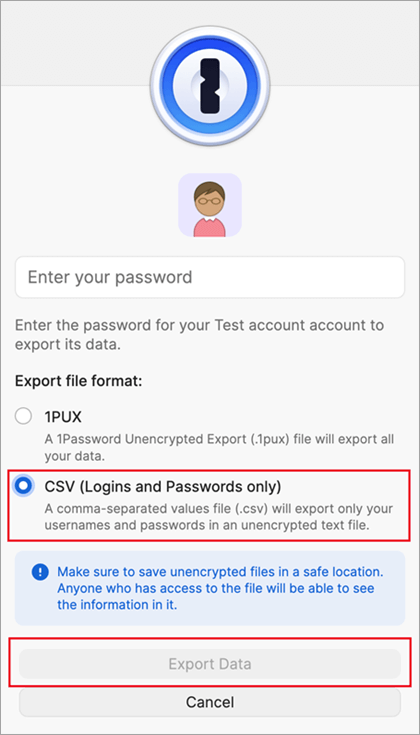
Confirm your identity by using your 1Password account password.
-
Choose CSV as the export file format and click Export Data.
-
Choose where you want to save your 1Password data and select Open.
When it's done, continue to step 2, importing your passwords.
Important: Firefox only allows exporting passwords from the desktop browser, so you'll need to have the Firefox desktop browser to do this.
-
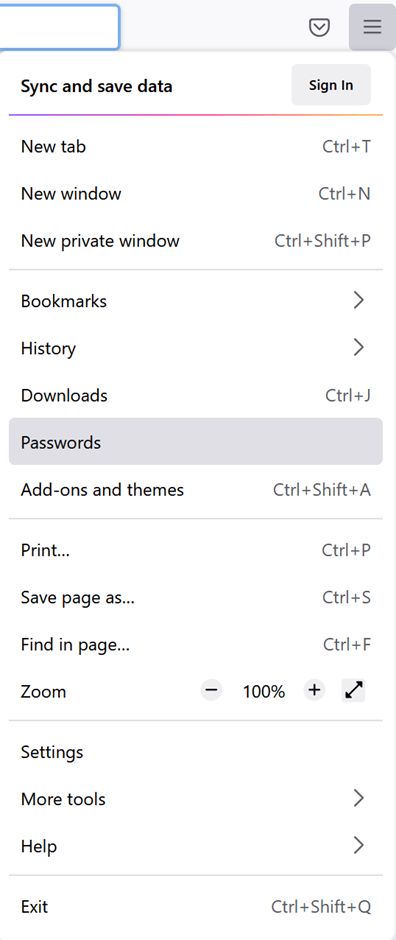
Sign into the latest version of Firefox on your desktop and select the menu button
-
Select Passwords.
-
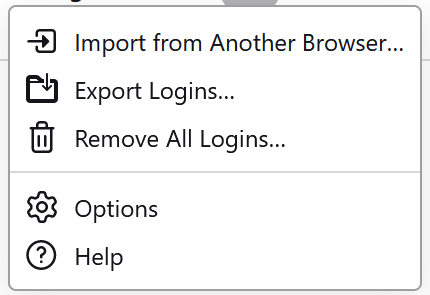
From the Firefox logins page, select the menu, select Export Logins, and then confirm your intent by selecting Export.
-
Confirm your identity by entering your PIN, device password or by scanning your fingerprints. Once successfully identified, Firefox exports your passwords in CSV format to the selected location.
When it's done, continue to step 2, importing your passwords.
Important: LastPass only allows exporting passwords from a desktop browser.
-
Sign in to the LastPass web site and select Advanced Options, and then select Export.
-
Confirm your identity with your LastPass master password.
-
The CSV file will be saved to your computer.
When it's done, continue to step 2, importing your passwords.
Important: Bitwarden only supports exporting passwords from a desktop browser.
-
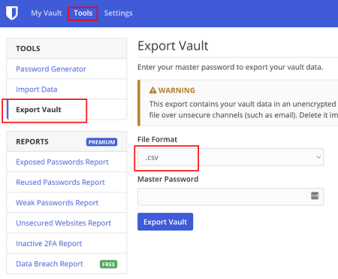
Sign in into Bitwarden and select Tools > Export vault.
-
Choose CSV as the file format.
-
Provide your Bitwarden master password, and then select Export vault to start exporting.
When it's done, continue to step 2, importing your passwords.
Important: Dashlane only supports exporting passwords from a desktop browser.
-
Sign into Dashlane and at the top right, select the My account menu.
-
Select Settings.
-
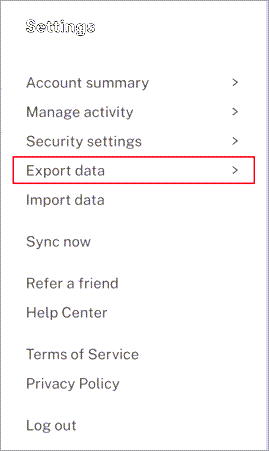
Select Export data and confirm your identity by using your Dashlane master password.
-
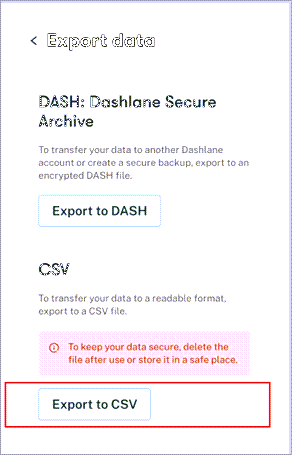
Select Export to CSV. Dashlane will save a zip file containing the CSV to your default download location.
When it's done, continue to step 2, importing your passwords.
Important: NordPass only supports exporting passwords from a desktop browser.
-
Sign into NordPass and select Settings.
-
Select Export Items and confirm your identity by using your NordPass master password.
-
Save the CSV on your computer.
When it's done, continue to step 2, importing your passwords.
Important: RoboForm only allows exporting passwords from its Windows or Mac app.
-
Start RoboForm from your computer and sign into your account.
-
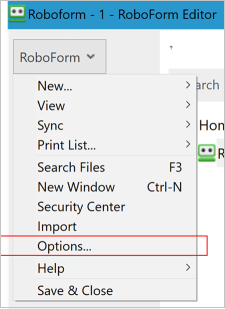
Select Options from the RoboForm menu.
-
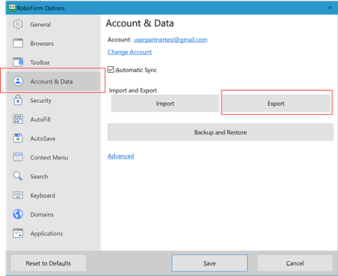
Select Account & Data > Export.
-
Choose a safe location to save your exported file. Select Logins as the Data type and select the CSV file as the format, and then select Export.
-
Select Yes on the confirmation message and the CSV file will be saved to the selected location.
When it's done, continue to step 2, importing your passwords.
If your browser isn't listed, follow the steps in your browser to export your passwords into a non-encrypted CSV file.
Step 2 - Import your passwords to Microsoft Authenticator
Click the headings below for more information.
-
Transfer the exported password file from step 1 above to your Android or iOS phone.
Important: While in a CSV, your passwords are visible to anyone who has the CSV file. Always use a secure method to transfer, such as OneDrive.
-
Download the shared password file to your mobile.
-
Open Authenticator and tap Passwords.
-
Tap then Settings.
-
Scroll down to Import Passwords and choose how you want to import.
-
Follow the steps to select your CSV file and import the passwords.
Important: After successfully importing your passwords delete the CSV file from your desktop or mobile phone.
-
Transfer the exported password file from step 1 above to your Android or iOS phone.
Important: While in a CSV, your passwords are visible to anyone who has the CSV file. Always use a secure method to transfer, such as OneDrive.
-
Download the shared password file to your mobile.
-
Share the downloaded password file with Authenticator to start the import.
Important: After successfully importing your passwords delete the CSV file from your desktop or mobile phone.

