Get started with Microsoft 365 Copilot Notebooks
Applies To

Introducing Copilot Notebooks–your own AI-powered workspace designed for the content that matters most to your task. Bring together all your relevant resources including Copilot Chat, files, pages, meeting notes, links, and more in one place. Share notebooks with your team to collaborate in real time, exchange knowledge, and build together with Copilot. As you work, get focused answers tailored to your notebook’s content and keep adding references that update dynamically as your project evolves.
Note: A Microsoft 365 Copilot license is required to use Copilot Notebooks. Additionally, accounts must have a SharePoint or OneDrive license (service plan) in order to create notebooks. Copilot Notebooks is also available for Microsoft 365 Personal, Family, and Premium subscribers. Learn more about Microsoft 365 Copilot licensing and Microsoft 365 Copilot plans.
Why use Copilot Notebooks?
-
Gather your content: Bring together all your Copilot chats, Microsoft 365 files, pages, meeting notes, and more into a notebook.
-
Get answers: Ask questions and Copilot can analyze notebook content to find answers, identify key themes, and draw insights.
-
Draft smarter: Draft something new with Copilot based on the content in your notebook.
-
Collaborate in real time: Co-create with your team and Copilot using shared content.
Where to find Copilot Notebooks
Sign in to microsoft365.com. You should see your name and picture at the bottom left corner of the screen. Notebooks is on the left side of the screen.
How to use Copilot Notebooks
-
Select Notebooks.
-
On the Notebooks overview page, select Create first notebook.
Note: If you've previously created other notebooks, select New notebook from the Notebooks homepage.
-
Enter a new name for your notebook.
-
Under Add references, you can add references in a few different ways:
-
Search – In the search bar, enter the name of a specific reference, then select Add.
Tip: If you only remember part of the name, enter it and Copilot will suggest references for you to choose from.
-
OneDrive – Select the OneDrive icon.
-
Suggestions – Copilot will suggest references you may want to add. Select any from the list. You can select multiple references.
-
-
Select Create.
-
Select Notebooks.
-
On the Notebooks overview page under Your notebooks, select the notebook you want to work with.
-
You can add references in a few different ways:
-
Search – Select Add reference. In the search bar, enter the name of a specific reference, then select Add.
Tip: If you only remember part of the name, enter it and Copilot will suggest references for you to choose from.
-
OneDrive – Select Add reference, and then select the OneDrive icon to open your OneDrive folder.
-
Suggestions – Select Add reference. Copilot will suggest references you may want to add. Select any from the list. You can select multiple references.
-
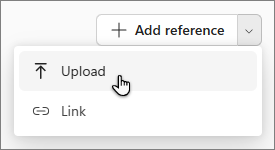
Upload – Use the dropdown menu next to Add reference, and then select Upload.
-
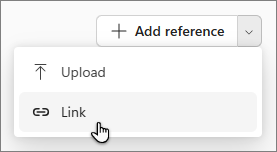
Link – Use the dropdown menu next to Add reference, and then select Link
Note: Links to supported file types within your Microsoft 365 account can be added and grounded on, but all other links, including web links, aren't supported.
-
-
Select Create.
Share a notebook
-
Open the notebook you want to share.
-
In the upper left corner of your notebook, select the people icon.
-
Enter names or email addresses.
-
Select Invite.
You’ll see an Invite successful message with a list of invitees.
Start using Copilot Notebooks
Here are some examples to inspire you. Copy, paste, and adapt these for your own tasks.
Organize research for a new project: You’re gathering all relevant materials to kick off planning. Ask:
|
|
Prepare for a team sync: You want to ensure the meeting is focused and productive. Ask:
|
|
Draft an initial proposal using your collected references: You need a concise proposal to share with stakeholders. Ask:
|
|
More ways to work with Copilot Notebooks
Add reference files to your Microsoft 365 Copilot Notebooks
Provide custom instructions for your Microsoft 365 Copilot Notebook


